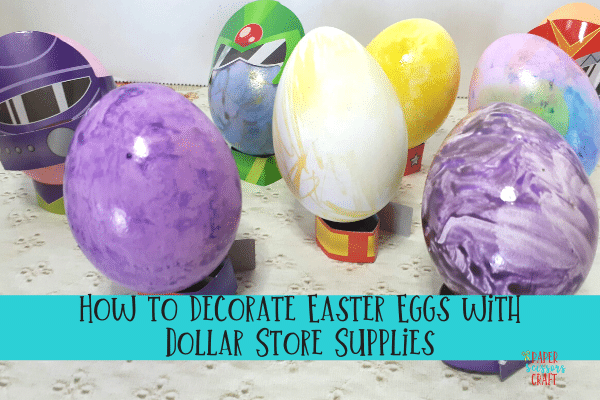
How to Decorate Easter Eggs with Dollar Store Supplies
In this post you will learn how to dye and decorate Easter eggs with supplies from the dollar store, and you’ll know if dollar store supplies are truly worth it.
Decorate Easter Eggs with Kits from the Dollar Store
Did you know that you can buy Easter Egg dye kits at the Dollar store? Not only that, but you can also buy other supplies to decorate your eggs.
We decide to do an experiment this year and find out all the different ways you can decorate Easter eggs. We decided to start with the dollar store. I didn’t even know you could buy dye at the dollar store until I saw some when we were there for our weekly trip. (We go to the dollar store WAY too much, it’s honestly one of my favorite places).
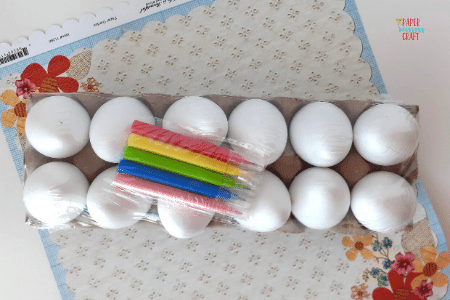
I also purchased some plastic eggs from Target that I saw during a Target run. They were only $3.00 for 12 eggs, so we experimented with them as well with our dollar store supplies. They also came with 6 small markers.
I was pleasantly surprised with the durability of the dollar store supplies. Let’s dive into all the ways below:
This post contains affiliate links.
How to Decorate Easter Eggs with Dollar Store Supplies
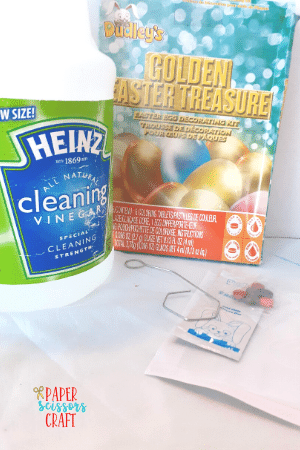
What you need:
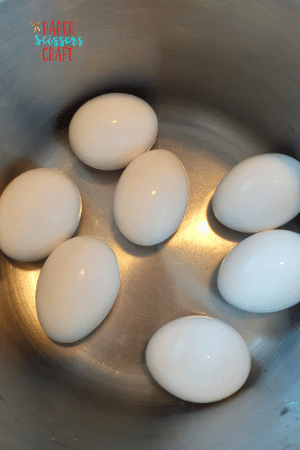
Boiled Eggs (if you need a good boiling egg recipe, look no further. I know, it seems like a simple task, to boil eggs, but I always have to refer to my recipe).
Vinegar
Water
Plastic Cups (I highly recommend just using plastic cups for dipping the eggs into the dye, it makes for an easy clean up. You can buy plastic cups specifically for dying Easter eggs, but you don’t need to. They would be nice because they are short, but not a necessity.)
Paint (optional)
Paint Brushes
Dollar store egg dying kits or decorating kits
Plastic Eggs: Optional (I found some $3.00 plastic eggs from Target that we wanted to experiment with)
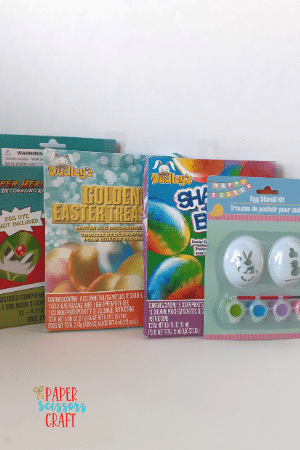
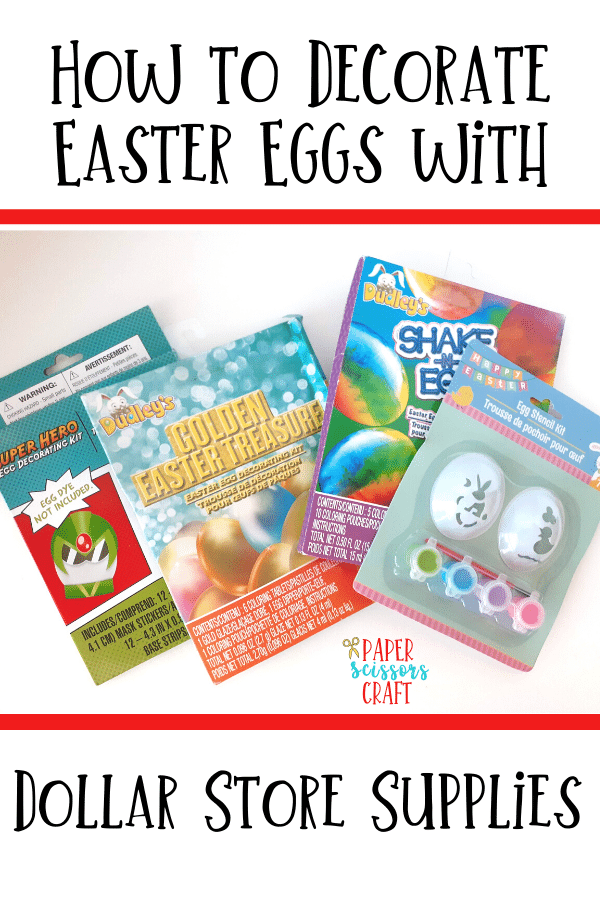
These are the different ones we bought:
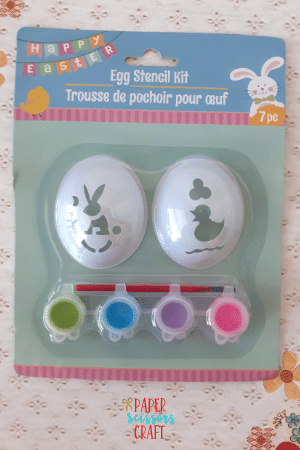
A stencil and paint for painting your Easter Eggs.
The original egg dying kit with the dying tablets, but it also included a packet to add a shimmer to your eggs.
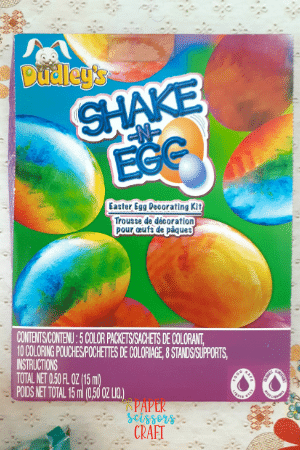
This Easter egg dying kit doesn’t use traditional dye, but you simply “shake an egg”.
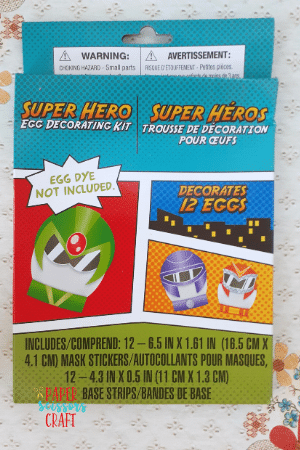
A superhero “costume” kit. There is no dying involved in this kit. It’s a cardboard cutout that can wrap around your egg.
These were all purchased at the dollar store. They all included MOST of the supplies you need and the instructions. I’ll show you how we did it.
Easter Egg Decorating Instructions:
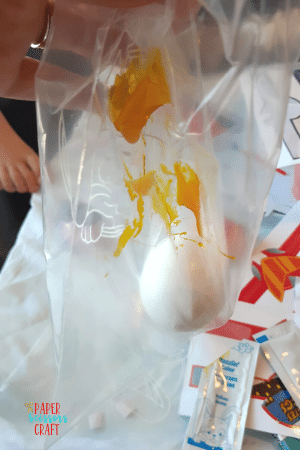
First, while our eggs were boiling, we decided to do the stencil and paint.
Stencil Easter Egg Decorating
What’s included:
2 egg stencils
4 paint colors
1 paint brush (I just gathered some of our own paint brushes as well)
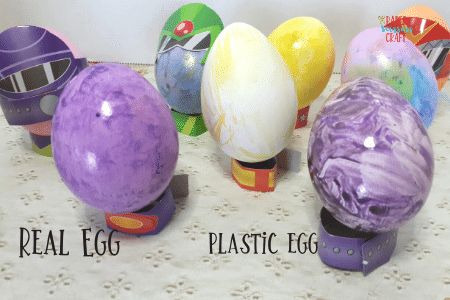
For this decorating kit we used our plastic eggs from Target. It was nice to have these handy because I hate wasting too many “real” eggs. And they are way more durable, obviously.
The kids loved painting the eggs. However, the stencils were extremely flimsy so it made it hard to paint with them. They didn’t shape around the egg perfectly. I wonder if a more expensive egg stencil would have worked better. You could also go a little further and use a temporary glue tack to make it adhere tight to the egg and then paint it.
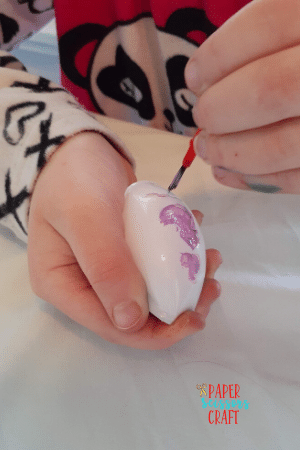
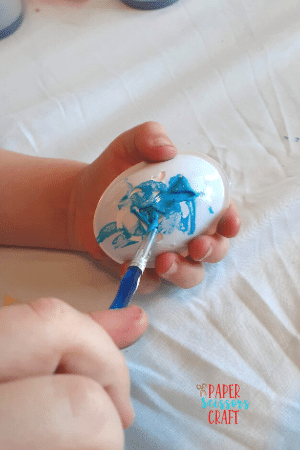
However, you don’t need stencils to paint eggs. You can just have the kids paint them with your own paint and brushes. The plastic eggs were perfect for this!
The plastic eggs came with these little markers, so we also colored the eggs, which my daughter loved. I think it’s because a maker is more controllable than a paint brush.
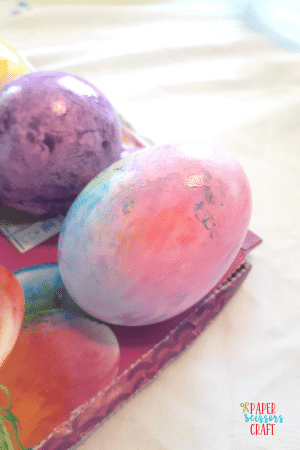
Next, we did the old fashion dying the Easter Eggs plus the shimmer coat.
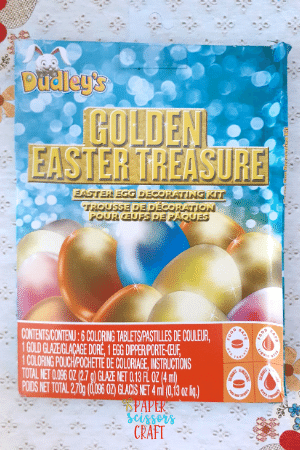
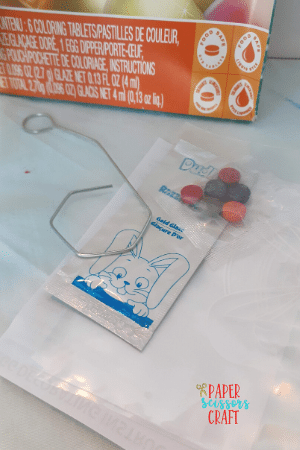
Golden Easter Egg Treasure Decorating Kit
What’s included:
6 different coloring tablets
A metal egg holder
Mini plastic bags
Shimmer liquid
What you’ll need:
Vinegar
Water
Cups
Instructions:
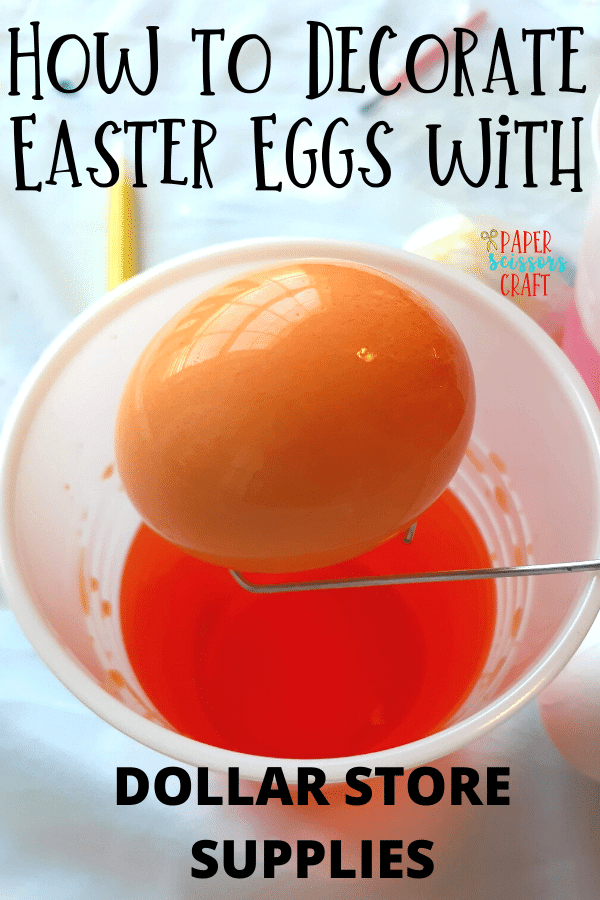
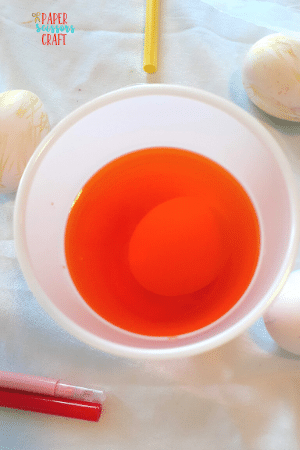
Boil your eggs.
Place each color tablet in a separate plastic cup full of 1 tbsp. of water.
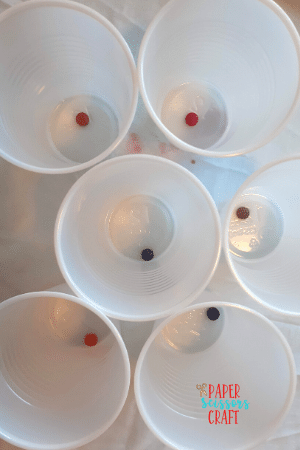
Wait until they are mostly dissolved and then add ½ cup of warm water.
Place 3 tbsp. of vinegar in each color cup except the purple and pink.

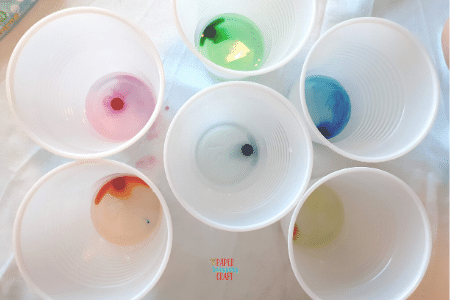
Place an egg in a cup of your color of choice. It doesn’t take long for the eggs to turn colors, but it will get darker depending on how long you keep it in there.
We did 2 minutes for my daughter.
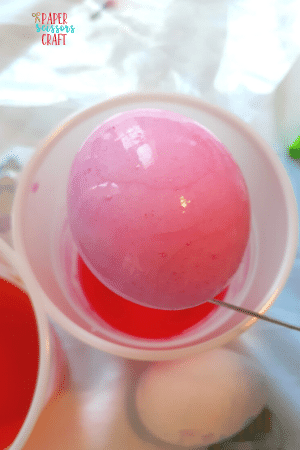
And we did 4 minutes for my son. (I guess he’s a little more on the patient side).
They turned out great! I was so surprised at how well the dye covered the egg and how great the color looked for being from the dollar store.
We set those aside to dry. One thing about the dollar store kits are that the boxes are pretty flimsy. They aren’t quite as sturdy as the PAAS brand. The eggs set on them really well, but I don’t think we would have been able to fill the whole box with drying eggs. They would eventually just ended up sitting on the table.
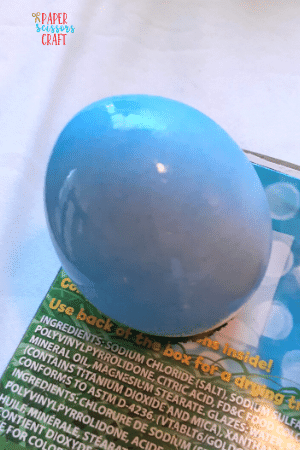
Sidenote: Just in case you were wondering. The plastic eggs do NOT dye. I tried holding it in there for like 10-15 minutes and…nothing.

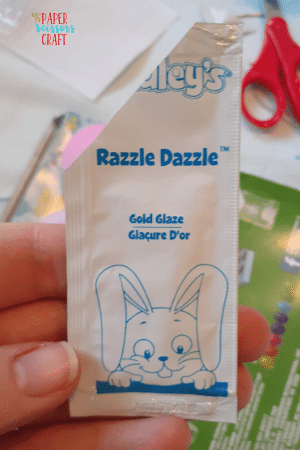
Once they dried you can add the shimmer.
Egg Shimmer Instructions:
Place the egg (dried) in the mini plastic bags provided.
Pour a few drops of the shimmering liquid into the bag with the egg and shake it all around trying to cover the egg fully.
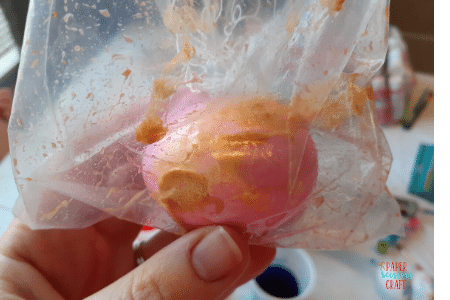
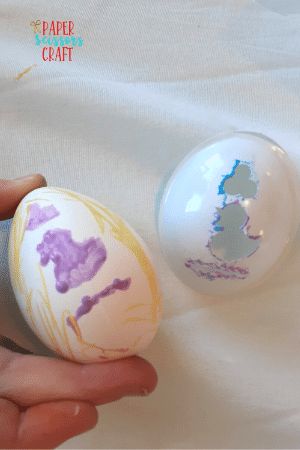
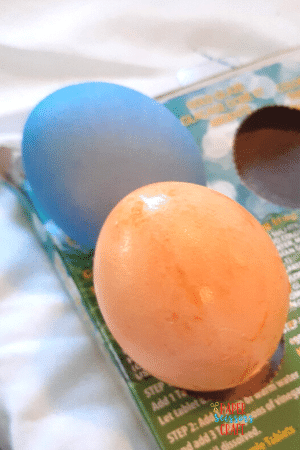
From the picture on the box it looks like they will create a nice gold shine/shimmer to your egg. This wasn’t really the case.
It was interesting, and I guess slightly disappointing. My daughter was disappointed. You couldn’t really see the shimmer really well. It just didn’t adhere to the egg well. We even added a few extra drops to one of them, and it didn’t do much. You can barely tell it was on there at all. I wonder if a more expensive one would turn out better.
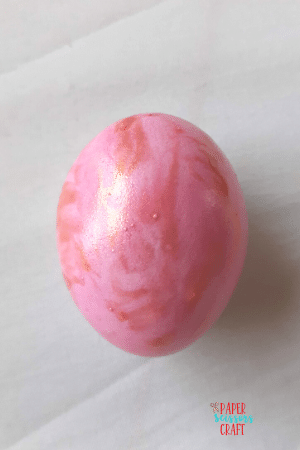
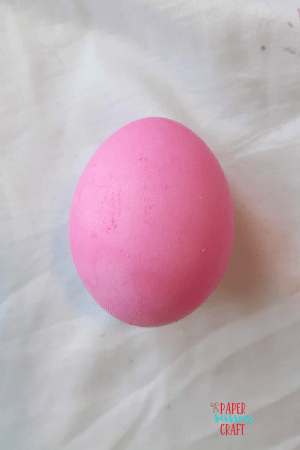
The left is shimmer and the right is no shimmer. I guess it looks kind of marble.
Once the shimmer dried, we decided to add our superhero costumes.
Superhero Egg Decorating Kit
What’s included:
Super hero decorating strips
Super hero stands for the base of the eggs.
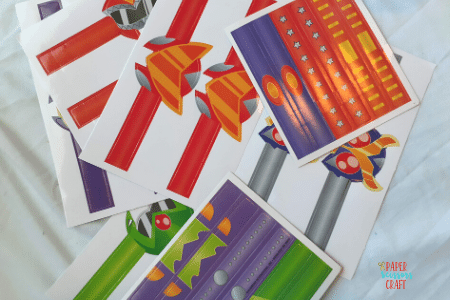
These are a little under-rated. My kids loved them, and they are so simple. We mixed and matched, and my daughter put them on however she wanted. It was great.
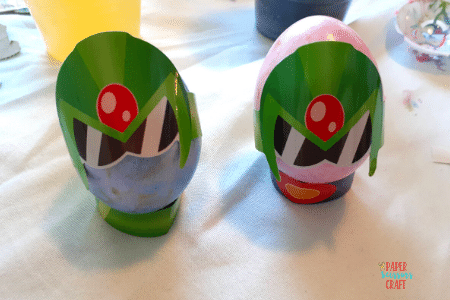
You just wrap the little strips around your egg and then make a circle with the base strips so that your egg sits in it. And BAM! You have a superhero egg! If you buy these, I highly suggest getting them from the dollar store.
Last, but not least, the shake an egg kit.
Shake an Egg Easter Kit
What’s included:
Mini plastic bags
liquid dye
Instructions
Instructions:
Knead the liquid dye for 1-2 minutes.
Place a hard-boiled egg in one of the mini plastic bags.
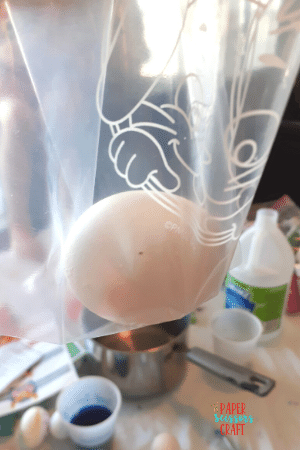
Put a few drops of the liquid dye into the bag.
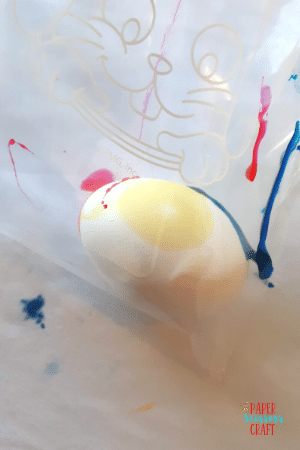
Close bag and shake. Spread the liquid dye all over the egg.
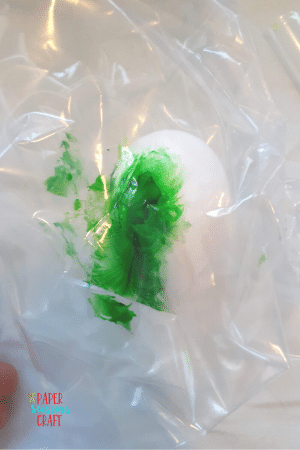
You can also do different colors which makes a tye-dye egg.
This one was one of my favorites. It was so easy and it turned out really cool. Again, I was impressed with the dollar store package. These turned out great. Make sure you knead the liquid dye, otherwise it’s not as easy to manipulate.
My only complaint was that the yellow color was not that liquidy. In fact, it was rather sticky. I don’t know if we didn’t knead it enough or that one was just faulty. But, all the other colors turned out great!
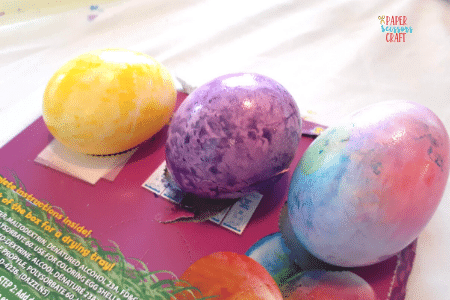
Also, the plastic eggs dyed with the liquid dye really well.
Overall, it was a really successful craft. The kids loved it, and the supplies held up rather well. I recommend getting the Shake n Egg and the Regular Easter egg dye without doing the shimmer from the dollar store.
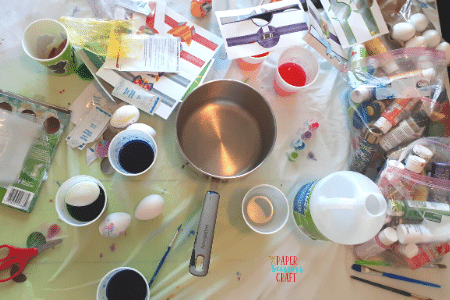
Our beautiful mess.
Check out these other Easter goodies:


Related: 60 + Practical Easter Egg Stuffers (not just candy)
Related: How to make Homemade Squishies
Related: Balloon Painting for kids: How fun is it?


Leave A Comment