Last updated: October 30, 2024
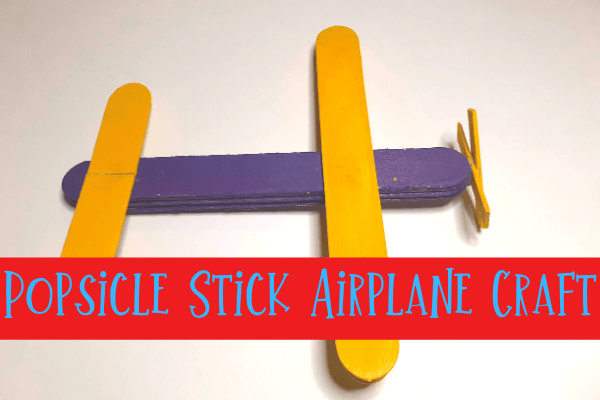
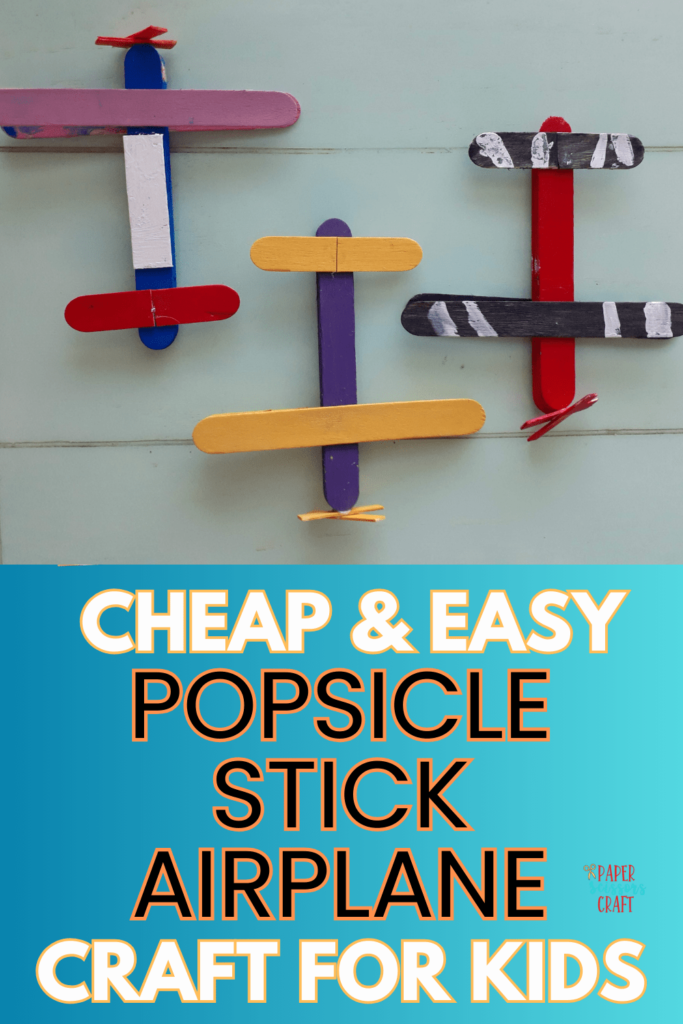
In this article I am sharing how to make the simplest craft with your kids – a popsicle stick airplane! This is one of the easiest crafts ever, and my kids LOVED doing it. One thing I love about little kids is how easy they are to please. Life is just so awesome to them and it’s the little things that matter.
There is a lesson in there too. My kids often remind me to find joy in the little things and live in the moment. This is easier said than done. I often find myself worrying about life while I watch it pass me by. Remember to enjoy the little things and live in each moment.
This post may contain affiliate links.
Reasons I Love this Popsicle Stick Airplane Craft
This is so easy, and it’s cheap, AND the kids love it. When you need a quick craft with supplies you probably already have in your home, this is it. We do crafts enough that my daughter will say, “I want to make something”. I love that, but sometimes it can be overwhelming to pull out all the supplies and get going, and then spend an hour doing a craft.
I love pulling out only a few items and having fun together. A popsicle stick airplane is great because you can be creative with them too. There is no wrong way to put it together. My son often likes to improvise and add sticks in random places. So, let’s get started reviewing how we made the airplanes
How To Make a Popsicle Stick Airplane Instructions
Below we will review the supplies you need for this craft, plus provide detailed step-by-step instructions for making some creative popsicle stick airplanes with your kids. Finally, you can check out the variations for this craft too.
Time: 20-30 minutes
Cost: $5 + hot glue gun (if you don’t have one) or $0 if you already have all the supplies
Supplies
- 8-10 Popsicle Sticks per plane – You can buy the cheap ones from the Dollar Store, but I have found they don’t work as well
- Paint – I used acrylic, but puffy paint will also work. You can buy these individually at the store (Walmart, Hobby Lobby, Michaels) for like a dollar. I’ve collected quite a few colors over the years.
- Paint Brush – Any ole paint brush will do. If you don’t have any, I’d recommend just buying a cheap package at the store with different varieties (as shown in the link). It will work just fine.
- Scissors
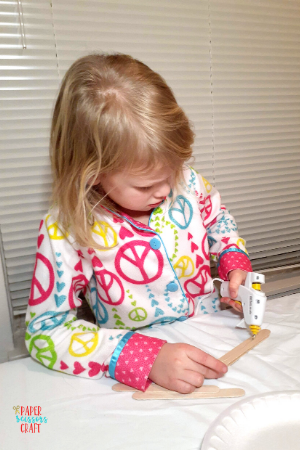
- Hot Glue Gun – I decided to buy a low temperature “kids” glue gun. It was $5.00. I loved it because my daughter used it, and she touched the glue and it wasn’t hot. She didn’t get burned at all and she was able to do the whole project by herself.
*They are not $5 anymore and sometimes they are hard to find, you can also use the dual temperature hot glue guns.
(however, keep in mind that it doesn’t stick as well, so if you’re doing heavy duty crafts, you will want a hotter one, but still cheap. I’ve been using my cheap one for years)
I also want to add that the glue gun comes with low temperature glue. I have found that it doesn’t really work well. The glue doesn’t adhere as well. I just used regular glue sticks in the low temperature gun. It works well. Also, low temperature guns are only for very small craft projects. I wouldn’t use it on something that needs to be sturdy.
For more craft ideas and templates, check out my shop with something for every season!
Instructions
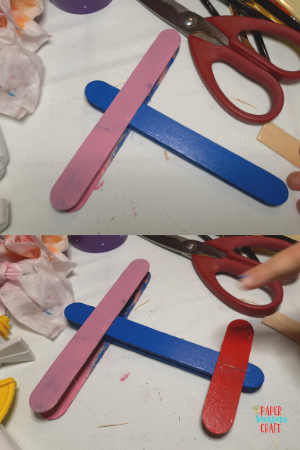
Step 1: Glue 5 popsicle sticks right on top of each other.
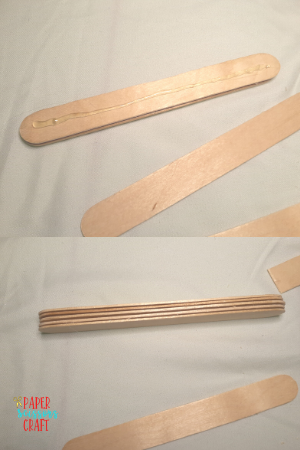
Step 2: Paint the 5 popsicle sticks a color of your choice. This will be the body of your plane.
Step 3: Pull out 2 more popsicle sticks and paint a color of your chose. These will be your wings.
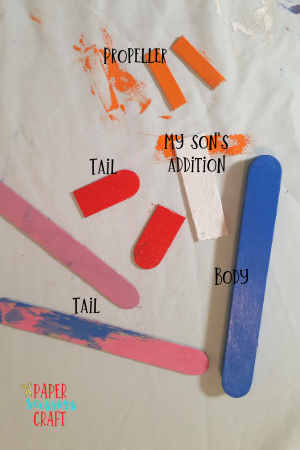

Step 4: Cut the ends of a popsicle stick off about 2 inches in. Paint them any color. These will be your tail.
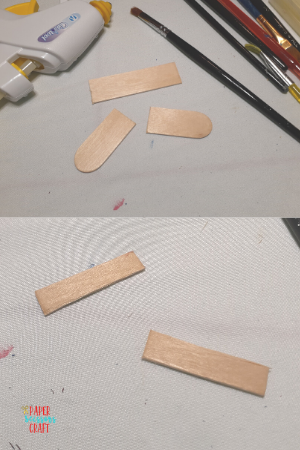
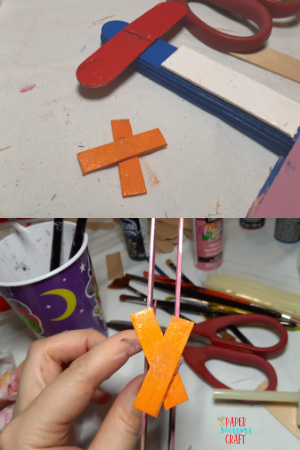
Step 5: Cut the end off of a popsicle stick, and then cut off another straight piece about 2 inches long. Cut that piece in half to make 2 small rectangular pieces. These will be your propeller. Paint them any color you desire.
Step 6: Let everything dry. You can use a blow dryer if you want, but it didn’t take long.
Step 7: Glue everything together.
Step 8: Glue one wing centered on the top of the body of the plane, about 1 inch down.
Step 9: Glue the other wing centered on the bottom of the body of the plane, lined up with the top wing.
Step 10: Glue the tail pieces. Centering the pieces.
Step 11: Glue the propeller together like an X and then glue to the front of your plane.
Step 12: Play with plane!
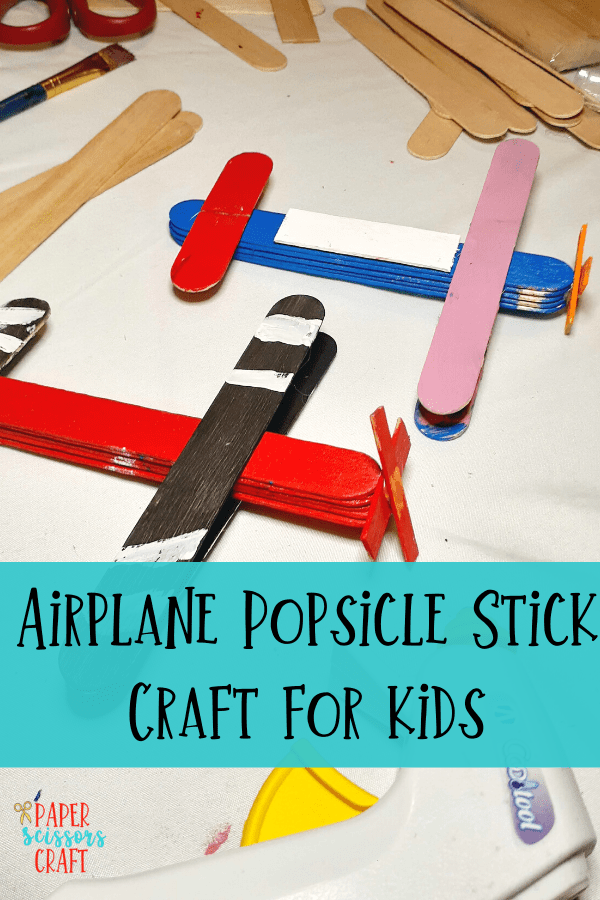
Variations
You can place the popsicle sticks in different directions. You can make the tail stand up, or put a button on the propeller. I actually wanted to do this, but I couldn’t find our buttons. Use your creativity, and ask your kids what they would like added to their plane. Stickers are a fan favorite too.
A popsicle stick plane is by far the easiest craft to make!
You’d think it wouldn’t be that easy, but it really is. My kids absolutely loved doing this craft too. If you want more popsicle stick crafts head over to DIY & Crafts, for even more ideas.
You might be interested in these other EASY crafts for kids:
- Caterpillar Paper Plate Craft
- Easy Kids Crafts that Require Little Supplies
- Recycled Toilet Paper Roll Butterfly Craft for Kids

Leave A Comment