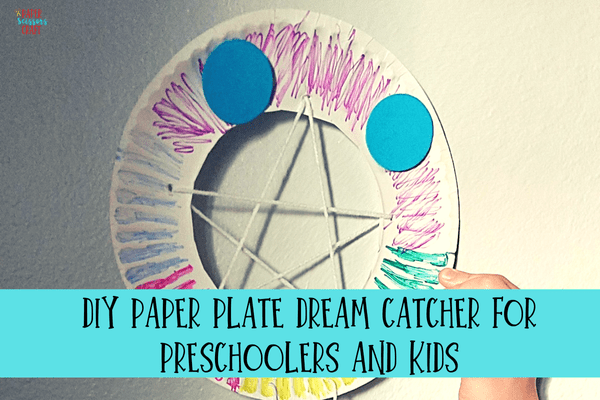
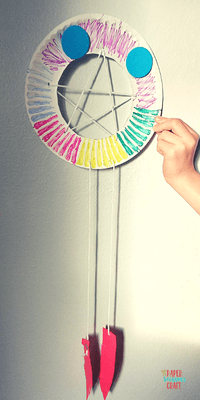
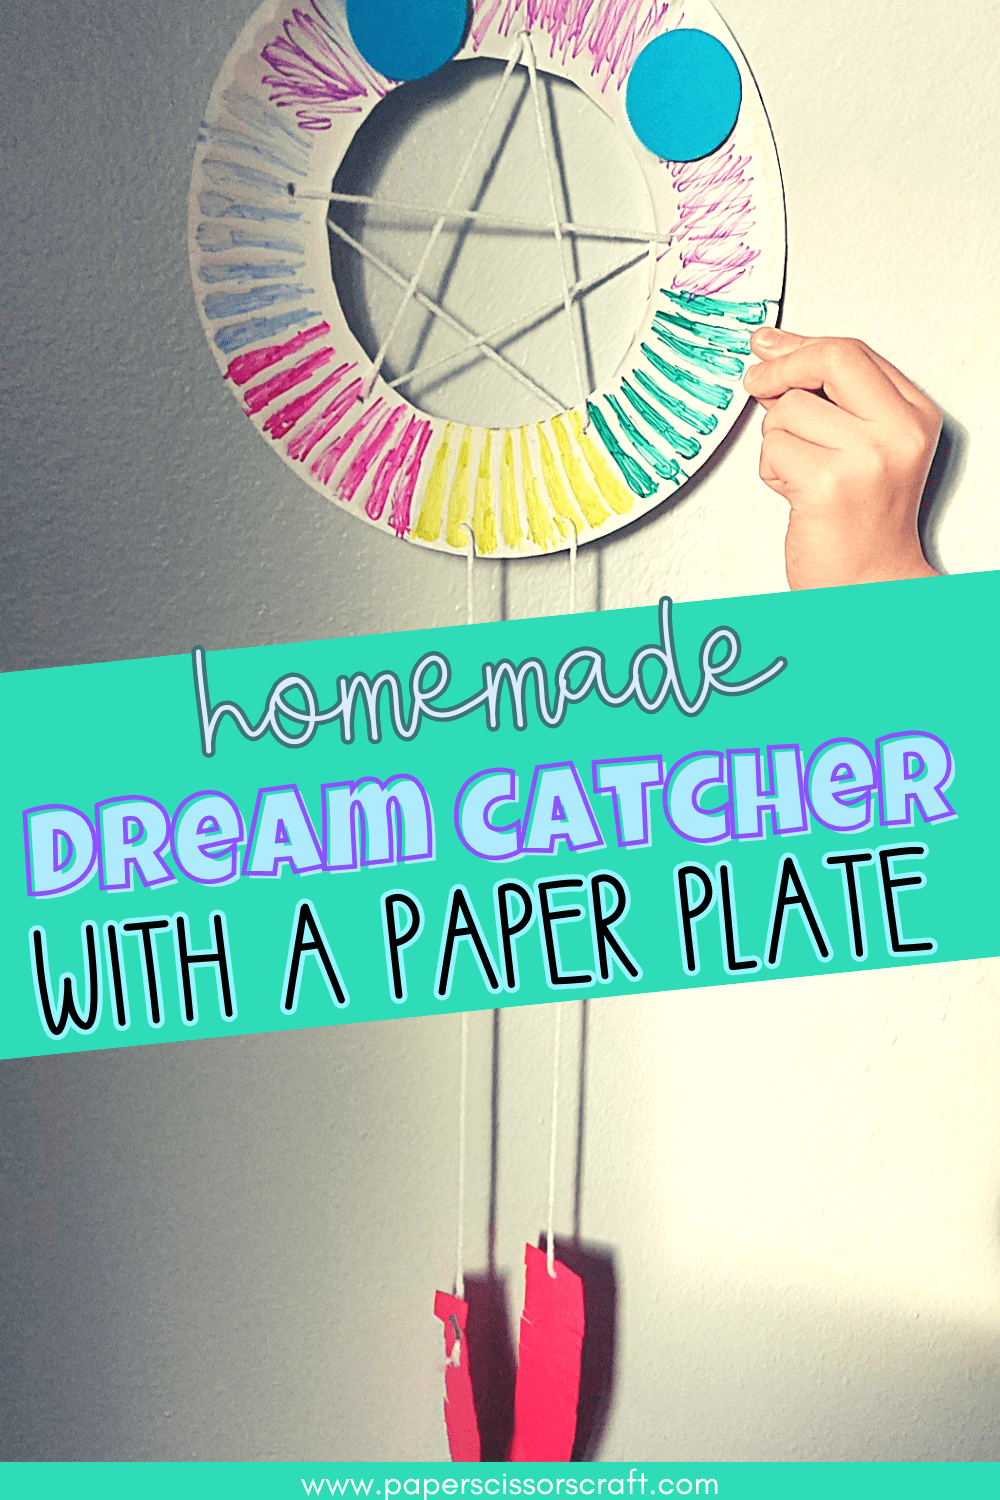
Looking for a colorful and creative craft that’s fun, easy, and keeps little hands busy? This DIY Paper Plate Dream Catcher is the perfect activity for preschoolers and young kids! With just a few simple supplies—like yarn, paper plates, and a sprinkle of imagination—your child can create their very own dream catcher to hang up and admire. Whether you’re teaching about shapes, practicing fine motor skills, or just need a quiet afternoon project, this craft checks all the boxes. Plus, it’s a beautiful keepsake when it’s finished!
This post contains affiliate links.
How to Make a Paper Plate Dream Catcher
Creating a paper plate dream catcher is simple and fun! With just a few supplies like a paper plate, yarn, and decorations, kids can make a colorful craft that’s both creative and meaningful. Follow these easy steps to get started.
Materials:
- Feather Template (optional)
- Markers
- Paper Plate (uncoated is best)
- Yarn or String
- Scissors
- Tape
- Embellishments (optional)
- Hole Punch (optional)
Instructions:
-
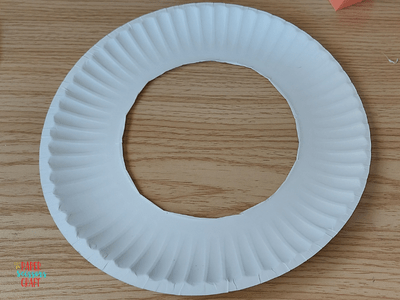
Cut the Center Out:
Start by carefully cutting out the inner circle of a paper plate, leaving the outer ring intact. This ring will form the base of your dream catcher. Be sure not to cut through the outside edge!
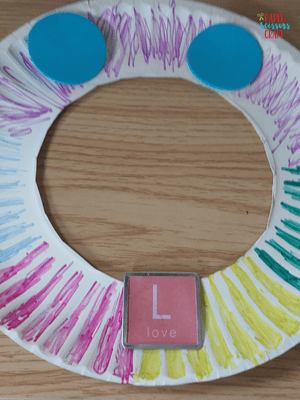
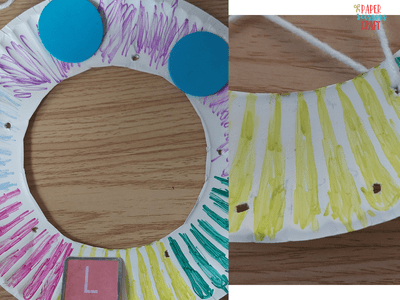
2. Decorate the Ring:
Time to get creative! Color and decorate the ring any way you like. Try using markers, stickers, glitter, ribbons, paint, washi tape, or embellishments to make it unique and beautiful.
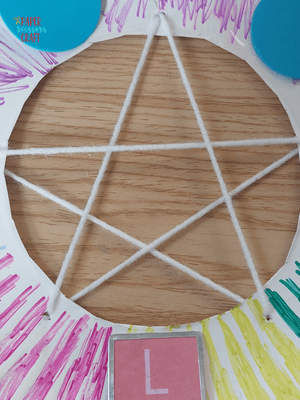
3. Punch the Holes:
Use a hole punch (or scissors if needed) to punch around 6 holes spaced evenly around the inner edge of the ring. You can add more holes if you’d like a more intricate design—it’s totally up to you!
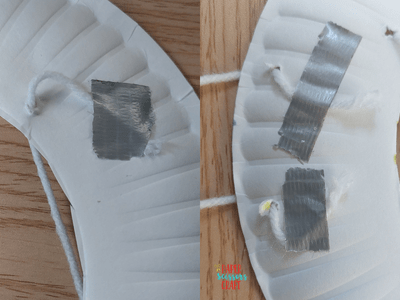
4. Add the Yarn Web:
Cut a piece of yarn about 4 feet long. Tape one end of the yarn to the back of the plate ring to anchor it. Begin weaving the yarn in and out of the holes in any pattern you like—zigzag, crisscross, spiral—get creative! When you reach the end, tape it to the back to secure it.
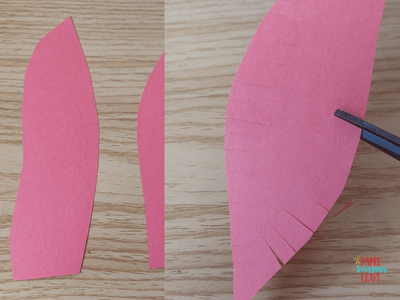
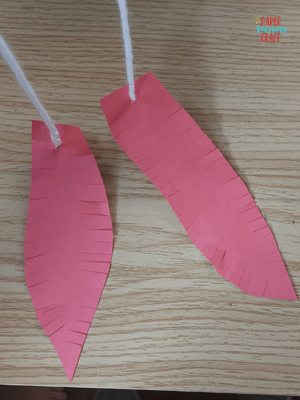
5. Make the Feathers:
Use the included feather template to cut out 4 feathers. You can either color the template directly or trace it onto colored construction paper. Once cut out, add small snips around the sides of each feather to give it a more realistic, fringed look.
6. Attach the Feathers:
Punch a hole at the top of each feather. Then, punch two holes at the bottom of your dream catcher ring.
-
-
Cut two pieces of yarn, each about 12 inches long.
-
Tie one end of each piece to a feather.
-
Tie the other end through the holes at the bottom of the dream catcher.
-
7. Display Your Dream Catcher:
Now it’s ready to hang! You can attach another loop of yarn at the top to hang it on a wall, door, or window.
What Age Group is the Dream Catcher good For
The paper plate dream catcher craft is ideal for preschoolers through elementary-aged kids, generally ages 3 to 10. Younger children will enjoy the painting, threading, and gluing aspects (with a little adult help), while older kids can get more creative with patterns, colors, and decorative details. It’s a flexible activity that can be simplified for toddlers or made more intricate for older children, making it a great fit for a wide range of ages and skill levels.

Fun and Creative Ways to Use a Paper Plate Dream Catcher
-
💤 Bedtime Decor – Hang it by your child’s bed to inspire peaceful dreams and add a handmade touch to their room.
-
🎨 Art Class Project – A fun and engaging craft for school or homeschool art lessons.
-
🪶 Learning About Cultures – Use it while teaching about Native American traditions and symbols.
-
🎉 Birthday Party Craft – A unique and mess-friendly activity for kids to make and take home.
-
👨👩👧 Family Craft Night – A relaxing and creative project for siblings or the whole family.
-
🏕️ Summer Camp Activity – Great for camp settings where kids can explore creativity and storytelling.
-
📚 Story Time Companion – Pair it with books about dreams or nighttime to deepen learning through play.
-
🏡 Rainy Day Craft – Keep little hands busy indoors with an easy and satisfying project.
-
🎁 Homemade Gift – Makes a thoughtful gift for grandparents or friends when personalized.
-
🧵 Fine Motor Skills Practice – Excellent for working on lacing, cutting, and gluing with preschoolers.
Hang this fun DIY Paper Plate Dream Catcher in your Room
This DIY Paper Plate Dream Catcher is more than just a fun craft—it’s a chance for kids to express creativity, practice cutting and threading, and create something they’re proud of. Whether you’re a parent, teacher, or homeschooler, this simple project is a great way to add a little magic and mindfulness to your day. Display it in a bedroom, give it as a gift, or use it as a conversation starter about dreams and feelings. However you use it, this easy dream catcher will definitely be a kid favorite!

Leave A Comment