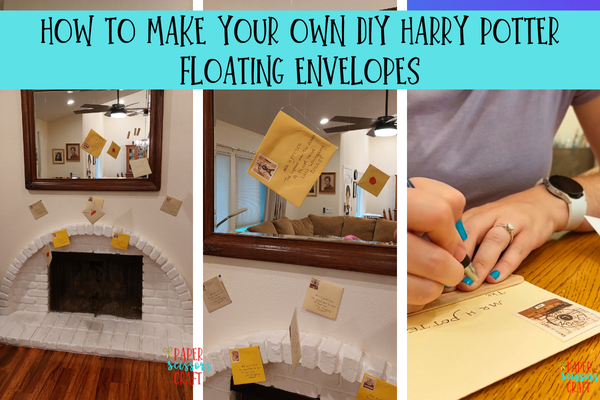

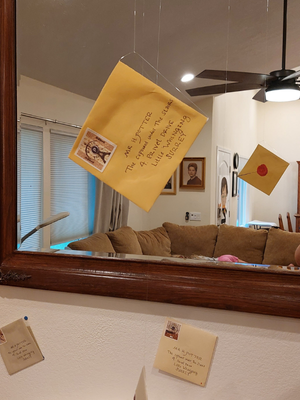
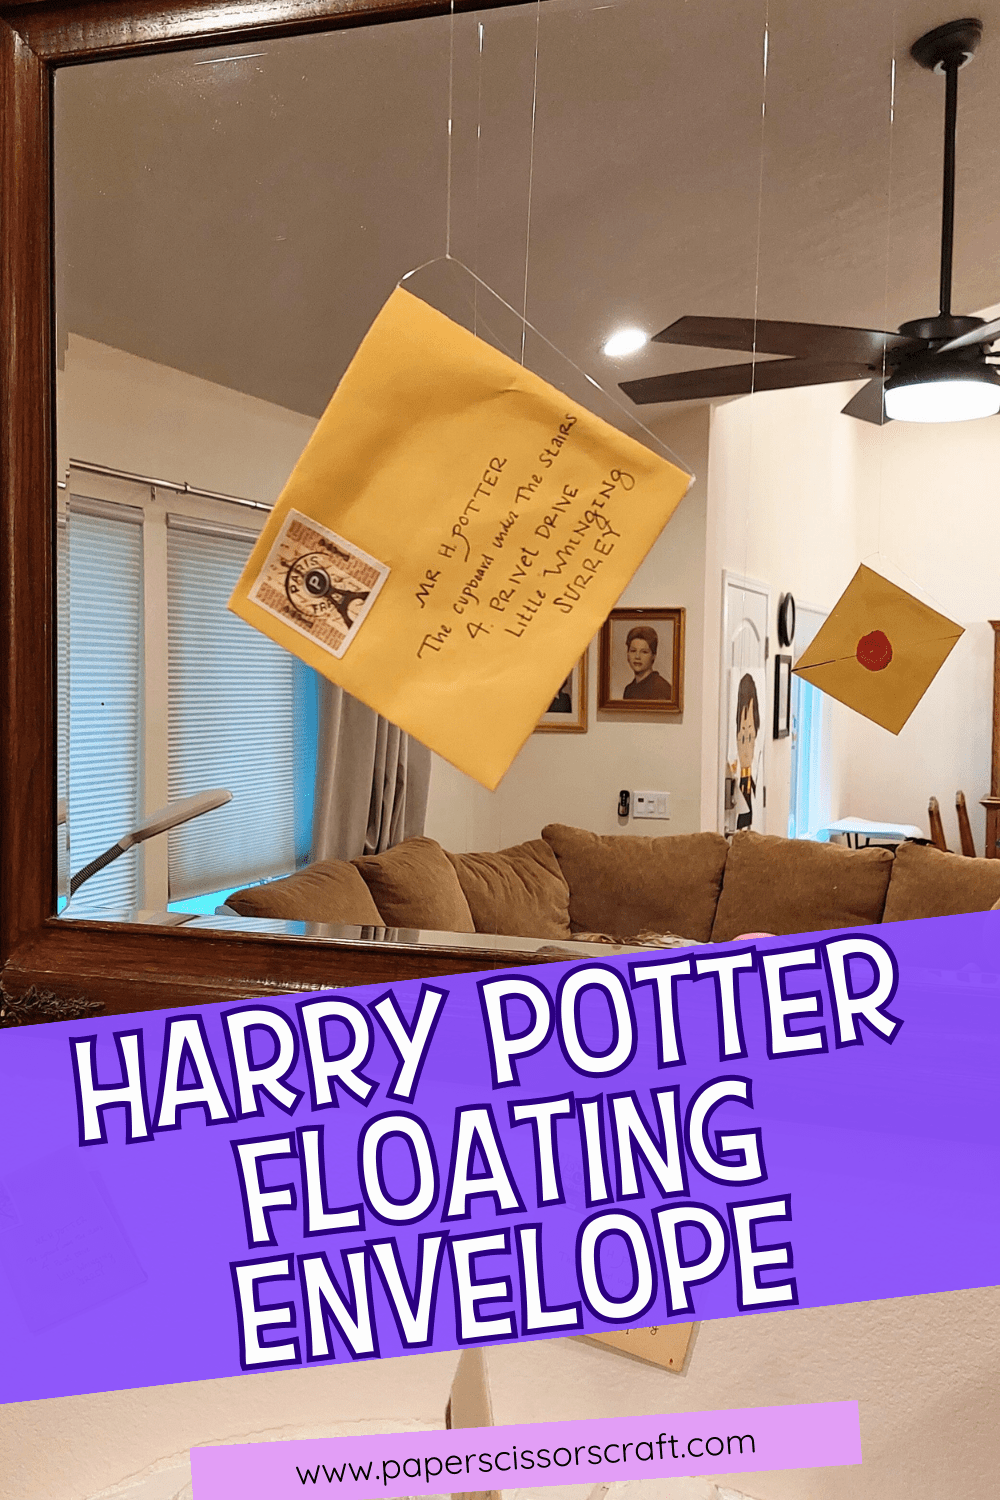
If you’re planning a Harry Potter party or simply want some magical décor, making your own DIY Hogwarts letters is the perfect project. I chose to create my own envelopes instead of using store-bought ones because I wanted them to be sturdier, and cardstock gave them just the right thickness. I also didn’t want to buy a whole pack of envelopes when I only needed a few, and I loved the cardstock colors I already had—though I ended up experimenting with different shades.
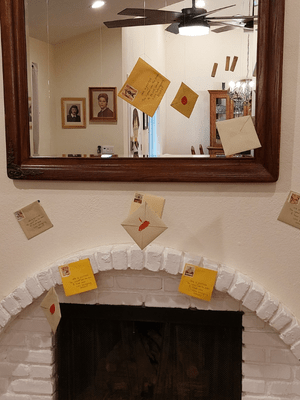
For my party, I used the envelopes purely as décor, letting them “float” around the room for a truly magical touch. Since these envelopes don’t open, they aren’t ideal for invitations, but they’re perfect for decoration, especially with the pointed triangle flap design on the back that feels more authentic than a standard square flap.
This post contains affiliate links.
How to Make Harry Potter Envelopes
- Cardstock Paper (preferably brown or tan in color)
- Optional: Regular paper to use as template.
- Pen (color of your choice, I did black)
- Stamp (Old-timey if possible) I found some cute paper at Hobby Lobby and cut out little “stamps”. They have tons of vintage stickers, paper, and cutouts. This would be cool to use.
- Glue
- Tape
- Fishing Line
Instructions:
-
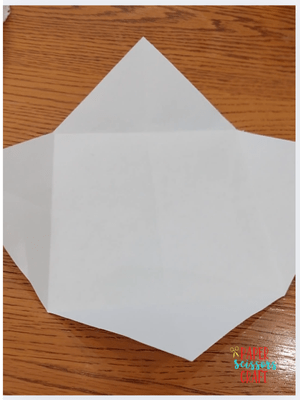
Create a template first: I started by making a simple paper template so I could test the folds without having to redo them on cardstock. I trimmed an 8.5″ x 11″ sheet into an 8.5″ x 8.5″ square to use as my guide.
-
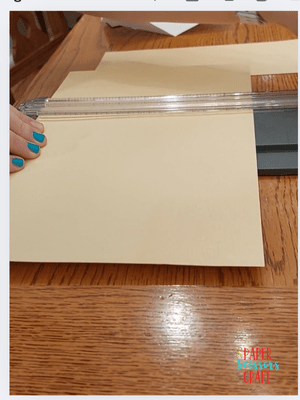
Cut your cardstock: Using the template, I trimmed my 12″ x 12″ cardstock down to the same square size, ensuring my folds would line up perfectly.
-
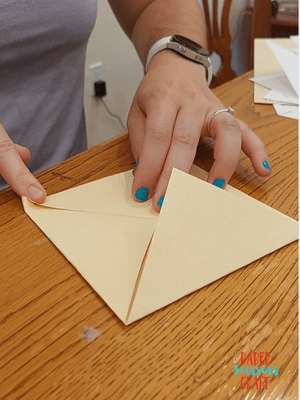
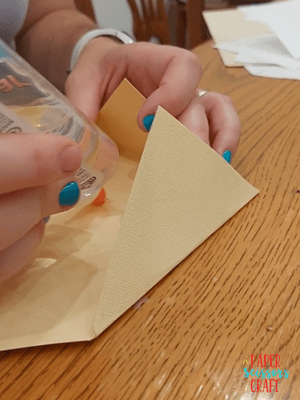
Fold the envelope: Place the square like a diamond and fold each corner into the center, overlapping slightly. Use glue or tape to secure the sides.
-
-
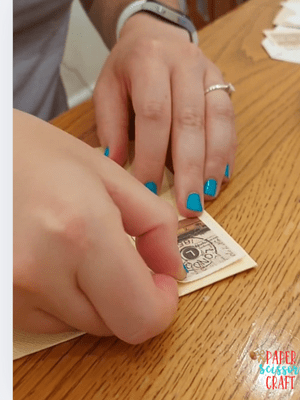
Add a stamp: After gluing, I cut a small “stamp” from pretty cardstock and glued it onto the top corner for decoration.
-
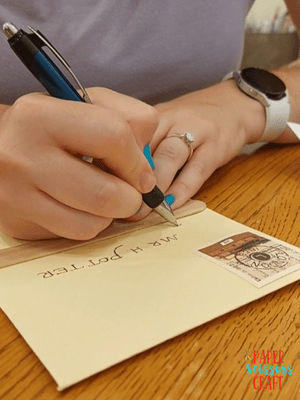
Write the address: Using an example Hogwarts envelope online, I copied the address in a whimsical font with a regular black pen.
-
Seal the magic: Finish the envelope with a seal. My daughter added her own by coloring a jagged red circle, but you could also use wax, stickers, or printed seals. You can buy these cute ones on Amazon.
Alternatives for DIY Harry Potter Envelopes
-
Use a premade envelope instead of making one from scratch.
-
Skip the template and fold directly on your cardstock or paper.
-
Print the Hogwarts-style lettering and glue it onto the envelope instead of writing by hand.
-
Buy decorative stamps to add a finishing touch instead of making your own seal.
How to Hang Harry Potter Envelopes to Make Them Float
-
Thread fishing line through the top of each envelope where it isn’t glued.
-
Tie a knot in the line to keep the envelope in place.
-
Tape the line to the ceiling or, for some, directly to the wall.
Tip: Use a broom to reach high spots on the ceiling safely.
Harry Potter Letter


This is such a creative and magical DIY project! The step-by-step instructions make it easy to follow, and using cardstock for sturdier envelopes is a great idea. I especially love the concept of hanging them with fishing line to create the illusion of floating Hogwarts letters—it perfectly captures the enchanting moment when Harry receives his letters. These floating envelopes would be a fantastic decoration for a Harry Potter themed party or kids’ craft activity. Thanks for sharing such a fun and imaginative tutorial! ✨📜
This tutorial is wonderfully detailed and easy to follow! I especially appreciate the step‑by‑step folding and hanging instructions — even beginners can achieve that magical floating effect with minimal supplies.