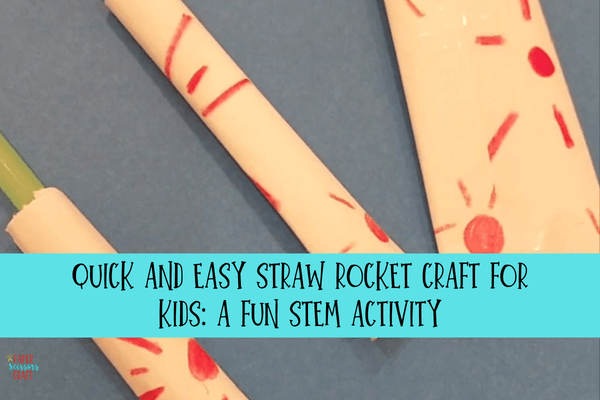
Looking for a simple and exciting craft that also teaches science? This straw rocket craft is the perfect blend of fun and learning! With just a few basic materials, kids can design, build, and launch their very own paper rockets—all while exploring important STEM concepts like air pressure, force, and motion. Whether you’re a teacher planning a hands-on science lesson, a homeschool parent looking for a quick activity, or just trying to entertain curious kids at home, this straw rocket project is sure to be a hit!
This post contains affiliate links.
How to Make Straw Rockets
Making straw rockets is simple, fun, and only takes a few minutes! With just paper, tape, and a straw, kids can build and launch their own mini rockets while learning about force and motion. Here’s how to get started!
Straw Rocket Materials:
-
Paper (printer or construction paper works great)
-
Scissors
-
Tape or glue stick
-
Plastic straw (wider straws like smoothie straws work best, but regular ones can work too) You could also use reusable straws for a long-lasting durable rocket.
-
Markers, crayons, or stickers (optional – for decorating)
-
Pencil (for rolling the paper into a rocket body, also optional)
Instructions:
-
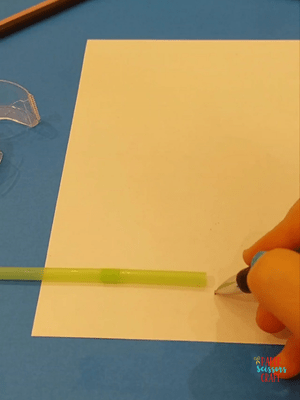
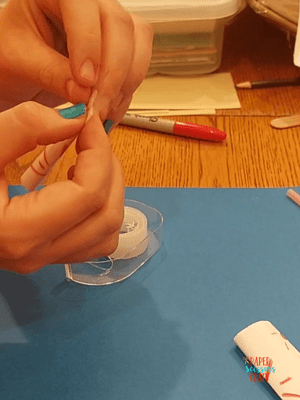
Cut the Rocket Body:
Cut a strip of paper about 1 inch wide and 4–6 inches long. You can use your straw for measuring.
-
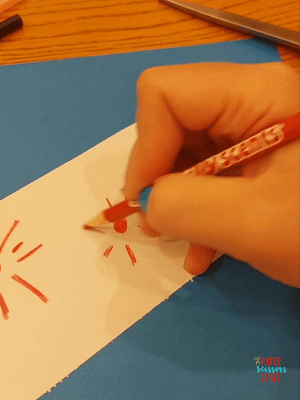
Decorate:
Use markers, crayons, or stickers to make your rocket fun and colorful! The more you decorate the more it will show up when you roll it up. You can also decorate after you roll it if you prefer.
-
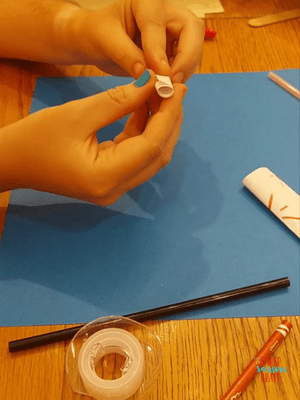
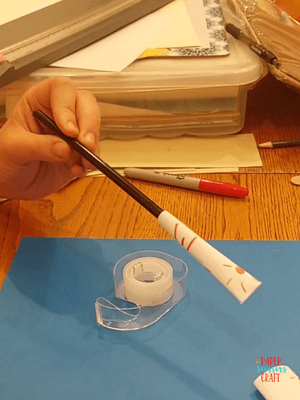
Roll it Up:
Wrap the strip tightly around a pencil to form a cylinder (this will be the rocket’s body). You don’t need a pencil to roll it up, but it can be helpful.
Tape the edge to hold the cylinder together, then slide the cylinder off the pencil.
-
Seal One End:
Fold or pinch one end of the cylinder shut and tape it closed. This becomes the top (or nose) of your rocket.
-
Add Fins (Optional):
Cut out 2–4 small triangles or rectangles from paper and tape them to the bottom of the rocket (the open end). These help with stability and make it look more rocket-like.
-
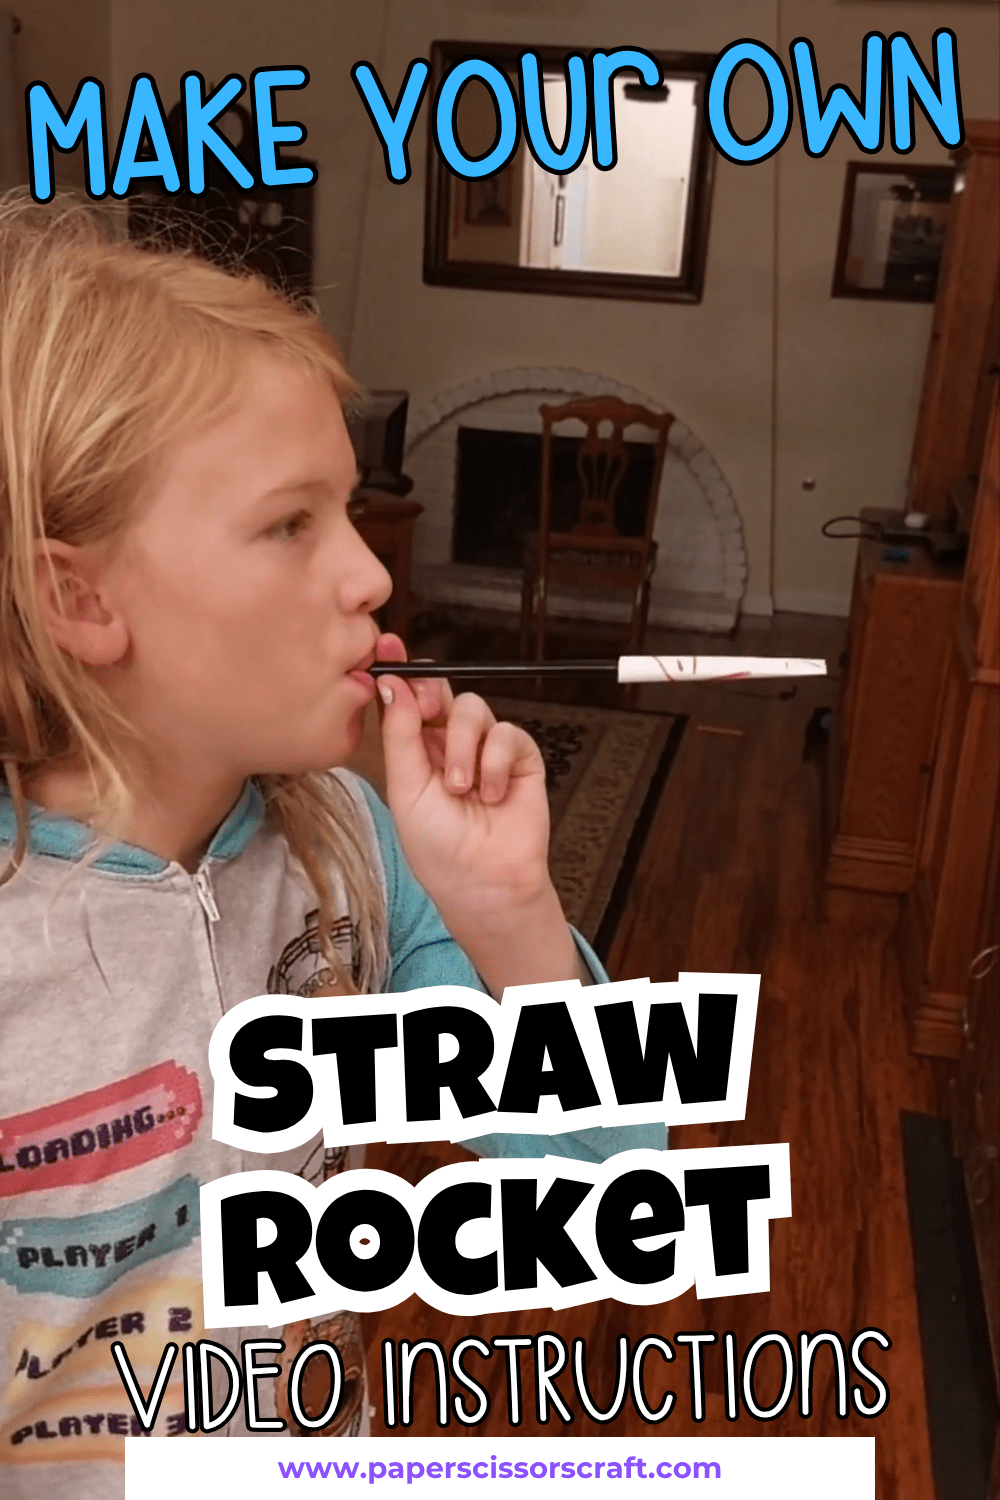
Ready to Launch:
Insert a plastic straw into the open end of your rocket (not the taped end). Aim your rocket away from faces, blow into the straw, and watch it fly!
Tips for Success:
-
Make sure the cylinder is snug but not tight around the straw – too loose and it won’t launch well, too tight and it won’t slide off.
-
Want to go farther? Try experimenting with longer rocket bodies, different fin shapes, or angled launches to explore simple physics concepts!
How to Turn Straw Rockets into a STEM Activity
Straw rockets are more than just a fun craft—they’re a great way to introduce kids to STEM concepts in a hands-on way. As they build and test their rockets, encourage them to explore science, technology, engineering, and math through activities like:
-
Experimenting with force – Try blowing harder or softer to see how it changes the rocket’s flight.
-
Measuring distances – Use a ruler or tape measure to see how far each rocket goes.
-
Changing angles – Launch the rocket at different angles and track how it affects the flight path.
-
Modifying designs – Add fins, change the length of the rocket, or use different types of straws.
-
Recording observations – Have kids make predictions, record results, and draw conclusions.
With just a few tweaks, your straw rocket craft turns into a simple and exciting STEM lesson that keeps kids learning through play!
How Will You Make Your Straw Rockets Today?
Straw rockets are not only quick and easy to make—they’re also a great way to spark curiosity and introduce kids to basic physics in a fun, hands-on way. Plus, they can customize and experiment with different rocket shapes to see what flies best! Whether it’s for a classroom science unit, a rainy-day craft, or a party activity, this STEM-inspired project is guaranteed to launch some smiles. Give it a try and watch your kids’ creativity—and their rockets—soar!

Leave A Comment